Controller
控制器Controller
控制器复杂提供访问应用程序的行为,通常通过接口定义或注解定义两种方法实现。
控制器负责解析用户的请求并将其转换为一个模型。
在Spring MVC中一个控制器类可以包含多个方法
在Spring MVC中,对于Controller的配置方式有很多种
Controller的配置方式
实现Controller接口
Controller是一个接口,在org.springframework.web.servlet.mvc包下,接口中只有一个方法;
//实现该接口的类获得控制器功能
public interface Controller {
    //处理请求且返回一个模型与视图对象
    ModelAndView handleRequest(HttpServletRequest var1, HttpServletResponse var2) throws Exception;
}
测试
web.xml :
<?xml version="1.0" encoding="UTF-8"?>
<web-app xmlns="http://xmlns.jcp.org/xml/ns/javaee"
         xmlns:xsi="http://www.w3.org/2001/XMLSchema-instance"
         xsi:schemaLocation="http://xmlns.jcp.org/xml/ns/javaee http://xmlns.jcp.org/xml/ns/javaee/web-app_4_0.xsd" version="4.0">
    <!--1.配置DispatcherServlet-->
    <servlet>
        <servlet-name>springmvc</servlet-name>
        <servlet-class>org.springframework.web.servlet.DispatcherServlet</servlet-class>
        <init-param>
            <param-name>contextConfigLocation</param-name>
            <param-value>classpath:springmvc-servlet.xml</param-value>
        </init-param>
        <load-on-startup>1</load-on-startup>
    </servlet>
    <servlet-mapping>
        <servlet-name>springmvc</servlet-name>
        <url-pattern>/</url-pattern>
    </servlet-mapping>
</web-app>
springmvc-servlet.xml :
<?xml version="1.0" encoding="UTF-8"?>
<beans xmlns="http://www.springframework.org/schema/beans"
       xmlns:xsi="http://www.w3.org/2001/XMLSchema-instance"
       xmlns:context="http://www.springframework.org/schema/context"
       xmlns:mvc="http://www.springframework.org/schema/mvc"
       xsi:schemaLocation="http://www.springframework.org/schema/beans
                           http://www.springframework.org/schema/beans/spring-beans.xsd
                           http://www.springframework.org/schema/context
                           https://www.springframework.org/schema/context/spring-context.xsd
                           http://www.springframework.org/schema/mvc
                           https://www.springframework.org/schema/mvc/spring-mvc.xsd">
    <!--<context:component-scan base-package="com.lc.controller" />-->
    <!--<mvc:default-servlet-handler />-->
    <!--<mvc:annotation-driven />-->
    <!-- 视图解析器 -->
    <bean class="org.springframework.web.servlet.view.InternalResourceViewResolver" id="internalResourceViewResolver">
        <!-- 前缀 -->
        <property name="prefix" value="/WEB-INF/jsp/" />
        <!-- 后缀 -->
        <property name="suffix" value=".jsp" />
    </bean>
</beans>
编写一个Controller类,ControllerTest1 :
//定义控制器
//注意点:不要导错包,实现Controller接口,重写方法;
public class ControllerTest1 implements Controller {
    public ModelAndView handleRequest(HttpServletRequest httpServletRequest,
                                      HttpServletResponse httpServletResponse) throws Exception {
        //返回一个模型视图对象
        ModelAndView mv = new ModelAndView();
        mv.addObject("msg","Test1Controller");
        mv.setViewName("test");
        return mv;
    }
}
编写完毕后,去Spring配置文件springmvc-servlet.xml中注册请求的bean;name对应请求路径,class对应处理请求的类 :
<bean name="/t1" class="com.kuang.controller.ControllerTest1"/>编写前端test.jsp,注意在WEB-INF/jsp目录下编写,对应我们的视图解析器 :
<%@ page contentType="text/html;charset=UTF-8" language="java" %>
<html>
    <head>
        <title>Kuangshen</title>
    </head>
    <body>
        Welcome to ${msg} !
    </body>
</html>
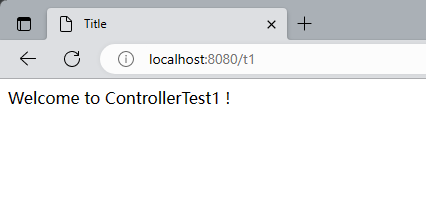
配置Tomcat运行测试 :

说明 :
实现接口Controller定义控制器是较老的办法
缺点是:一个控制器中只有一个方法,如果要多个方法则需要定义多个Controller;定义的方式比较麻烦;
使用注解
@Controller注解类型用于声明Spring类的实例是一个控制器(在讲IOC时还提到了另外3个注解);
(@Component、@Repository、@Service、@Controller )Spring可以使用扫描机制来找到应用程序中所有基于注解的控制器类,为了保证Spring能找到你的控制器,需要在配置文件中声明组件扫描。
<!-- 自动扫描指定的包,下面所有注解类交给IOC容器管理 -->
<context:component-scan base-package="com.kuang.controller"/>
增加一个ControllerTest2类,使用注解实现 :
//@Controller注解的类会自动添加到Spring上下文中
@Controller //代表这个类会被Spring接管,被这个注解的类中的方法,如果返回值为String,并且有页面可以跳转,就会被视图解析器解析
public class ControllerTest2{
    //映射访问路径
    @RequestMapping("/t2")
    public String index(Model model){
        //Spring MVC会自动实例化一个Model对象用于向视图中传值
        model.addAttribute("msg", "ControllerTest2");
        //返回视图位置
        return "test";
    }
}
运行tomcat测试 :

可以发现,我们的两个请求都可以指向一个视图,但是页面结果的结果是不一样的,从这里可以看出视图是被复用的,而控制器与视图之间是弱偶合关系。
RequestMapping
@PathVariable 注解,让方法参数的值对应绑定到一个URI模板变量上。
@Controllerpublic class RestFulController {
    @RequestMapping("/add/{a}/{b}")
    public String test1(@PathVariable int a,@PathVariable int b, Model model){
        int res = a+b;
        model.addAttribute("msg","结果为"+res);
        return "test";    }
}
进行访问 :

设置了访问路径为add/{a}/{b}即可
需要传入指定的参数类型,若传入的参数类型错误则会报400错误 !
method指定请求类型
使用method属性指定请求类型 :
用于约束请求的类型,可以收窄请求范围。指定请求谓词的类型如GET, POST, HEAD, OPTIONS, PUT, PATCH, DELETE, TRACE等
映射访问路径设为POST请求
@RequestMapping(value = "/add/{a}/{b}",method = RequestMethod.POST)
public String test1(@PathVariable int a,@PathVariable int b, Model model){
        int res = a+b;
        model.addAttribute("msg","结果为"+res);
        return "test";
}
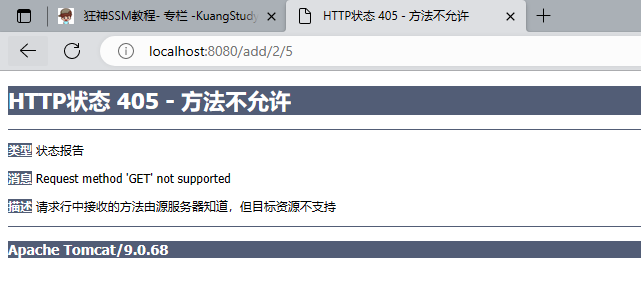
我们使用浏览器地址栏进行访问默认是Get请求,会报错405 :

如果将POST修改为GET则可以正常访问了 :
@RequestMapping(value = "/add/{a}/{b}",method = RequestMethod.GET)
public String test1(@PathVariable int a,@PathVariable int b, Model model){
        int res = a+b;
        model.addAttribute("msg","结果为"+res);
        return "test";
}
小结:
Spring MVC 的 @RequestMapping(method =RequestMethod.GET)
@PostMapping = @RequestMapping(method =RequestMethod.PUT)
@DeleteMapping = @RequestMapping(method =RequestMethod.PATCH)
修改Controller
@PostMapping("/add/{a}/{b}")public String test1(@PathVariable int a,@PathVariable int b, Model model){
    int res = a+b;
    model.addAttribute("msg","结果1为"+res);
    return "test";
}

@GetMapping("/add/{a}/{b}")public String test2(@PathVariable int a,@PathVariable int b, Model model){
    int res = a+b;
    model.addAttribute("msg","结果2为"+res);
    return "test";
}
添加a.jsp,表单为提交请求 :
<%@ page contentType="text/html;charset=UTF-8" language="java" %>
<html>
    <head>
        <title>Title</title>
    </head>
    <body>
    <form action="/add/1/6" method="post">
        <input type="submit">
        </form>
    </body>
</html>
运行 :
通过状态栏访问为get操作,跳转结果2(@GetMapping):

访问a.jsp,点击提交跳转,跳转结果1(@PostMapping):


使用路径变量的好处
简洁、高效、安全
使路径变得更加简洁;
获得参数更加方便,框架会自动进行类型转换。
通过路径变量的类型可以约束访问参数,如果类型不一样,则访问不到对应的请求方法,如这里访问是的路径是/commit/1/a,则路径与方法不匹配,而不会是参数转换失败。
安全,不会暴露变量名
结果跳转方式
ModelAndView
页面 : {视图解析器前缀} + viewName +{视图解析器后缀}
<!-- 视图解析器 -->
<bean class="org.springframework.web.servlet.view.InternalResourceViewResolver"  id="internalResourceViewResolver">
    <!-- 前缀 -->
    <property name="prefix" value="/WEB-INF/jsp/" />
    <!-- 后缀 -->
    <property name="suffix" value=".jsp" />
</bean>
对应的controller类 :
public class ControllerTest1 implements Controller {
    public ModelAndView handleRequest(HttpServletRequest httpServletRequest,
                                      HttpServletResponse httpServletResponse) throws Exception {
        //返回一个模型视图对象
        ModelAndView mv = new ModelAndView();
        mv.addObject("msg","ControllerTest1");
        mv.setViewName("test");
        return mv;
    }
}
ServletAPI
通过设置ServletAPI , 不需要视图解析器 .
通过HttpServletResponse进行输出
通过HttpServletResponse实现重定向
通过HttpServletRequest实现转发
@Controllerpublic class ResultGo {
    @RequestMapping("/result/t1")
    public void test1(HttpServletRequest req, HttpServletResponse rsp) throws IOException {
        rsp.getWriter().println("Hello,Spring BY servlet API");
    }
    @RequestMapping("/result/t2")
    public void test2(HttpServletRequest req, HttpServletResponse rsp) throws IOException {
        rsp.sendRedirect("/index.jsp");
    }
    @RequestMapping("/result/t3")
    public void test3(HttpServletRequest req, HttpServletResponse rsp) throws Exception {
        //转发
        req.setAttribute("msg","/result/t3");
        req.getRequestDispatcher("/WEB-INF/jsp/test.jsp").forward(req,rsp);
    }
}
(req : 请求,rsp : 响应)
重定向和转发
无视图解析器
通过SpringMVC来实现转发和重定向 - 无需视图解析器;
删除视图解析器,编写Controller代码 :
@Controllerpublic class ResultSpringMVC {
    @RequestMapping("/m1/t1")
    public String test(Model model){
        //转发
        model.addAttribute("msg","ModelTest");
        return "/WEB-INF/jsp/test.jsp";
    }    @RequestMapping("/m1/t2")

    public String test2(Model model){
        //转发二
        model.addAttribute("msg","ModelTest");
        return "forward:/WEB-INF/jsp/test.jsp";
    }

    @RequestMapping("/m1/t3")
    public String test3(Model model){
        //重定向
        return "redirect:/WEB-INF/jsp/test.jsp";
    }
}
重定向地址栏会变化 ,redirect重定向无法访问WEB-INF路径下。
因为redirect是相当于用户直接访问了路径,而用户不能访问WEB-INF目录下的文件,只有程序内部转发的时候才能转发到WEB-INF下的JSP。
有视图解析器
通过SpringMVC来实现转发和重定向 - 有视图解析器;
重定向 , 不需要视图解析器 , 本质就是重新请求一个新地方嘛 , 所以注意路径问题.
可以重定向到另外一个请求实现 . 直接返回redirect:+路径文件即可。
@Controllerpublic class ResultSpringMVC2 {
    @RequestMapping("/rsm2/t1")
    public String test1(){
        //转发
        return "test";
    }

    @RequestMapping("/rsm2/t2")
    public String test2(){
        //重定向
        return "redirect:/index.jsp";
        //return "redirect:hello.do"; //hello.do为另一个请求/
    }
}
数据处理
处理提交数据
提交的域名称和处理方法参数名一致
提交数据 : http://localhost:8080/hello?name=kuangshen
处理方法 :
@RequestMapping("/hello")
public String hello(String name){
    System.out.println(name);
    return "hello";
}
后台输出 : kuangshen
提交的域名称和处理方法参数名不一致
提交数据 :
<a href="http://localhost:8080/hello?username=kuangshen%E5%A4%84%E7%90%86%E6%96%B9%E6%B3%95(%E4%BD%BF%E7%94%A8%3Ca%20
href=" https:="" github.com="" requestparam"="" title="@RequestParam" class="at-link" target="_blank"
style="list-style: none; color: rgb(65, 131, 196); background-image: initial; background-position: initial;
background-size: initial; background-repeat: initial; background-attachment: initial; background-origin: initial;
background-clip: initial;">
@RequestParam()注解
http://localhost:8080/hello?username=kuangshen处理方法(使用@RequestParam()注解 括号内存入提交的域名称) :
//@RequestParam("username") : username提交的域的名称
.@RequestMapping("/hello")
    public String hello(@RequestParam("username") String name){
    System.out.println(name);
    return "hello";
}
后台输出 : kuangshen
提交的是一个对象
要求提交的表单域和对象的属性名一致 , 参数使用对象即可
实体类 :
public class User {
    private int id;
    private String name;
    private int age;
    //构造
    //get/set
    //tostring()
}
提交数据 : http://localhost:8080/mvc04/user?name=kuangshen&id=1&age=15
处理方法 :
@RequestMapping("/user")
public String user(User user){
    System.out.println(user);
    return "hello";
}
后台输出 : User { id=1, name=’kuangshen’, age=15 }
说明:如果使用对象的话,前端传递的参数名和对象名必须一致,否则就是null。
数据显示到前端
通过ModelAndView
public class ControllerTest1 implements Controller {
    public ModelAndView handleRequest(HttpServletRequest httpServletRequest,
                                      HttpServletResponse httpServletResponse) throws Exception {
        //返回一个模型视图对象
        ModelAndView mv = new ModelAndView();
        mv.addObject("msg","ControllerTest1");
        mv.setViewName("test");
        return mv;
    }
}
通过ModelMap
@RequestMapping("/hello")
public String hello(@RequestParam("username") String name, ModelMap model){
    //封装要显示到视图中的数据
    //相当于req.setAttribute("name",name);
    model.addAttribute("name",name);
    System.out.println(name);
    return "hello";
}
通过Model
@RequestMapping("/ct2/hello")
public String hello(@RequestParam("username") String name, Model model){
    //封装要显示到视图中的数据
    //相当于req.setAttribute("name",name);
    model.addAttribute("msg",name);
    System.out.println(name);
    return "test";
}
对比
Model 只有寥寥几个方法只适合用于储存数据,简化了新手对于Model对象的操作和理解;
ModelMap 继承了 LinkedMap ,除了实现了自身的一些方法,同样的继承 LinkedMap 的方法和特性;
ModelAndView 可以在储存数据的同时,可以进行设置返回的逻辑视图,进行控制展示层的跳转。
乱码问题解决
测试 :
我们可以在首页编写一个提交的表单
<form action="/e/t1" method="post">
    <input type="text" name="name">
    <input type="submit">
</form>
后台编写对应的处理类
@Controllerpublic class Encoding {
    @RequestMapping("/e/t1")
    public String test(Model model,String name){
        model.addAttribute("msg",name);
        //获取表单提交的值
        return "test";
        //跳转到test页面显示输入的值
    }
}
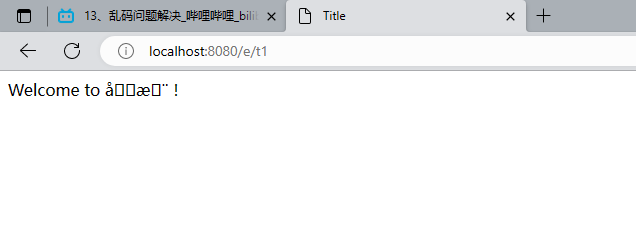
输入中文测试,发现乱码

JavaWeb过滤器解决
编写过滤器代码 :
package com.lc.filter;
import javax.servlet.*;
import java.io.IOException;
public class EncodingFilter implements Filter {

    public void init(FilterConfig filterConfig) throws ServletException {
    }

    public void doFilter(ServletRequest servletRequest,
                         ServletResponse servletResponse, FilterChain filterChain) throws IOException, ServletException {
        servletRequest.setCharacterEncoding("utf-8");
        servletResponse.setCharacterEncoding("utf-8");
        filterChain.doFilter(servletRequest,servletResponse);
    }

    public void destroy() {
    }
}
在web.xml中配置 :
<filter>
    <filter-name>encoding</filter-name>
    <filter-class>com.lc.filter.EncodingFilter</filter-class>
</filter><filter-mapping>
    <filter-name>encoding</filter-name>
    <url-pattern>/*</url-pattern>
</filter-mapping>
配置SpringMVC的乱码过滤
修改了xml文件 :
<filter>
    <filter-name>encoding</filter-name>
    <filter-class>org.springframework.web.filter.CharacterEncodingFilter</filter-class>
    <init-param>
        <param-name>encoding</param-name>
        <param-value>utf-8</param-value>
    </init-param>
</filter>
<filter-mapping>
    <filter-name>encoding</filter-name>
    <url-pattern>/*</url-pattern>
</filter-mapping>
有些极端情况下.这个过滤器对get的支持不好 .
其他方法
修改tomcat配置文件service.xml : 设置编码!
<Connector URIEncoding="utf-8" port="8080" protocol="HTTP/1.1" connectionTimeout="20000" redirectPort="8443" />自定义过滤器,然后在web.xml中配置过滤器
package com.kuang.filter;
import javax.servlet.*;
import javax.servlet.http.HttpServletRequest;
import javax.servlet.http.HttpServletRequestWrapper;
import javax.servlet.http.HttpServletResponse;
import java.io.IOException;
import java.io.UnsupportedEncodingException;
import java.util.Map;
/**
 * 解决get和post请求 全部乱码的过滤器
 */
public class GenericEncodingFilter implements Filter {
    @Override
    public void destroy() {
    }
    @Override
    public void doFilter(ServletRequest request, ServletResponse response,
                         FilterChain chain) throws IOException, ServletException {
        //处理response的字符编码
        HttpServletResponse myResponse=(HttpServletResponse) response;
        myResponse.setContentType("text/html;charset=UTF-8");
        // 转型为与协议相关对象
        HttpServletRequest httpServletRequest = (HttpServletRequest) request;
        // 对request包装增强
        HttpServletRequest myrequest = new MyRequest(httpServletRequest);
        chain.doFilter(myrequest, response);
    }
    @Override
    public void init(FilterConfig filterConfig) throws ServletException {    }
}
//自定义request对象,
HttpServletRequest的包装类class MyRequest extends HttpServletRequestWrapper {
    private HttpServletRequest request;
    //是否编码的标记
    private boolean hasEncode;
    //定义一个可以传入HttpServletRequest对象的构造函数,以便对其进行装饰
    public MyRequest(HttpServletRequest request) {
        super(request);
        // super必须写
        this.request = request;
    }
    // 对需要增强方法 进行覆盖
    @Override
    public Map getParameterMap() {
        // 先获得请求方式
        String method = request.getMethod();
        if (method.equalsIgnoreCase("post")) {
            // post请求
            try {
                // 处理post乱码
                request.setCharacterEncoding("utf-8");
                return request.getParameterMap();
            } catch (UnsupportedEncodingException e) {
                e.printStackTrace();
            }
        } else if (method.equalsIgnoreCase("get")) {
            // get请求
            Map<String, String[]> parameterMap = request.getParameterMap();
            if (!hasEncode) {
                // 确保get手动编码逻辑只运行一次
                for (String parameterName : parameterMap.keySet()) {
                    String[] values = parameterMap.get(parameterName);
                    if (values != null) {
                        for (int i = 0; i < values.length; i++) {
                            try {
                                // 处理get乱码
                                values[i] = new String(values[i] .getBytes("ISO-8859-1"), "utf-8");
                            } catch (UnsupportedEncodingException e) {
                                e.printStackTrace();
                            }
                        }
                    }
                }
                hasEncode = true;
            }
            return parameterMap;
        }
        return super.getParameterMap();
    }
    //取一个值
    @Override
    public String getParameter(String name) {
        Map<String, String[]> parameterMap = getParameterMap();
        String[] values = parameterMap.get(name);
        if (values == null) {
            return null;
        }
        return values[0];
        // 取回参数的第一个值
    }
    //取所有值
    @Override
    public String[] getParameterValues(String name) {
        Map<String, String[]> parameterMap = getParameterMap();
        String[] values = parameterMap.get(name);
        return values;
    }
}
网上大神所写,一般情况下,SpringMVC默认的乱码处理就已经能够很好的解决了!
