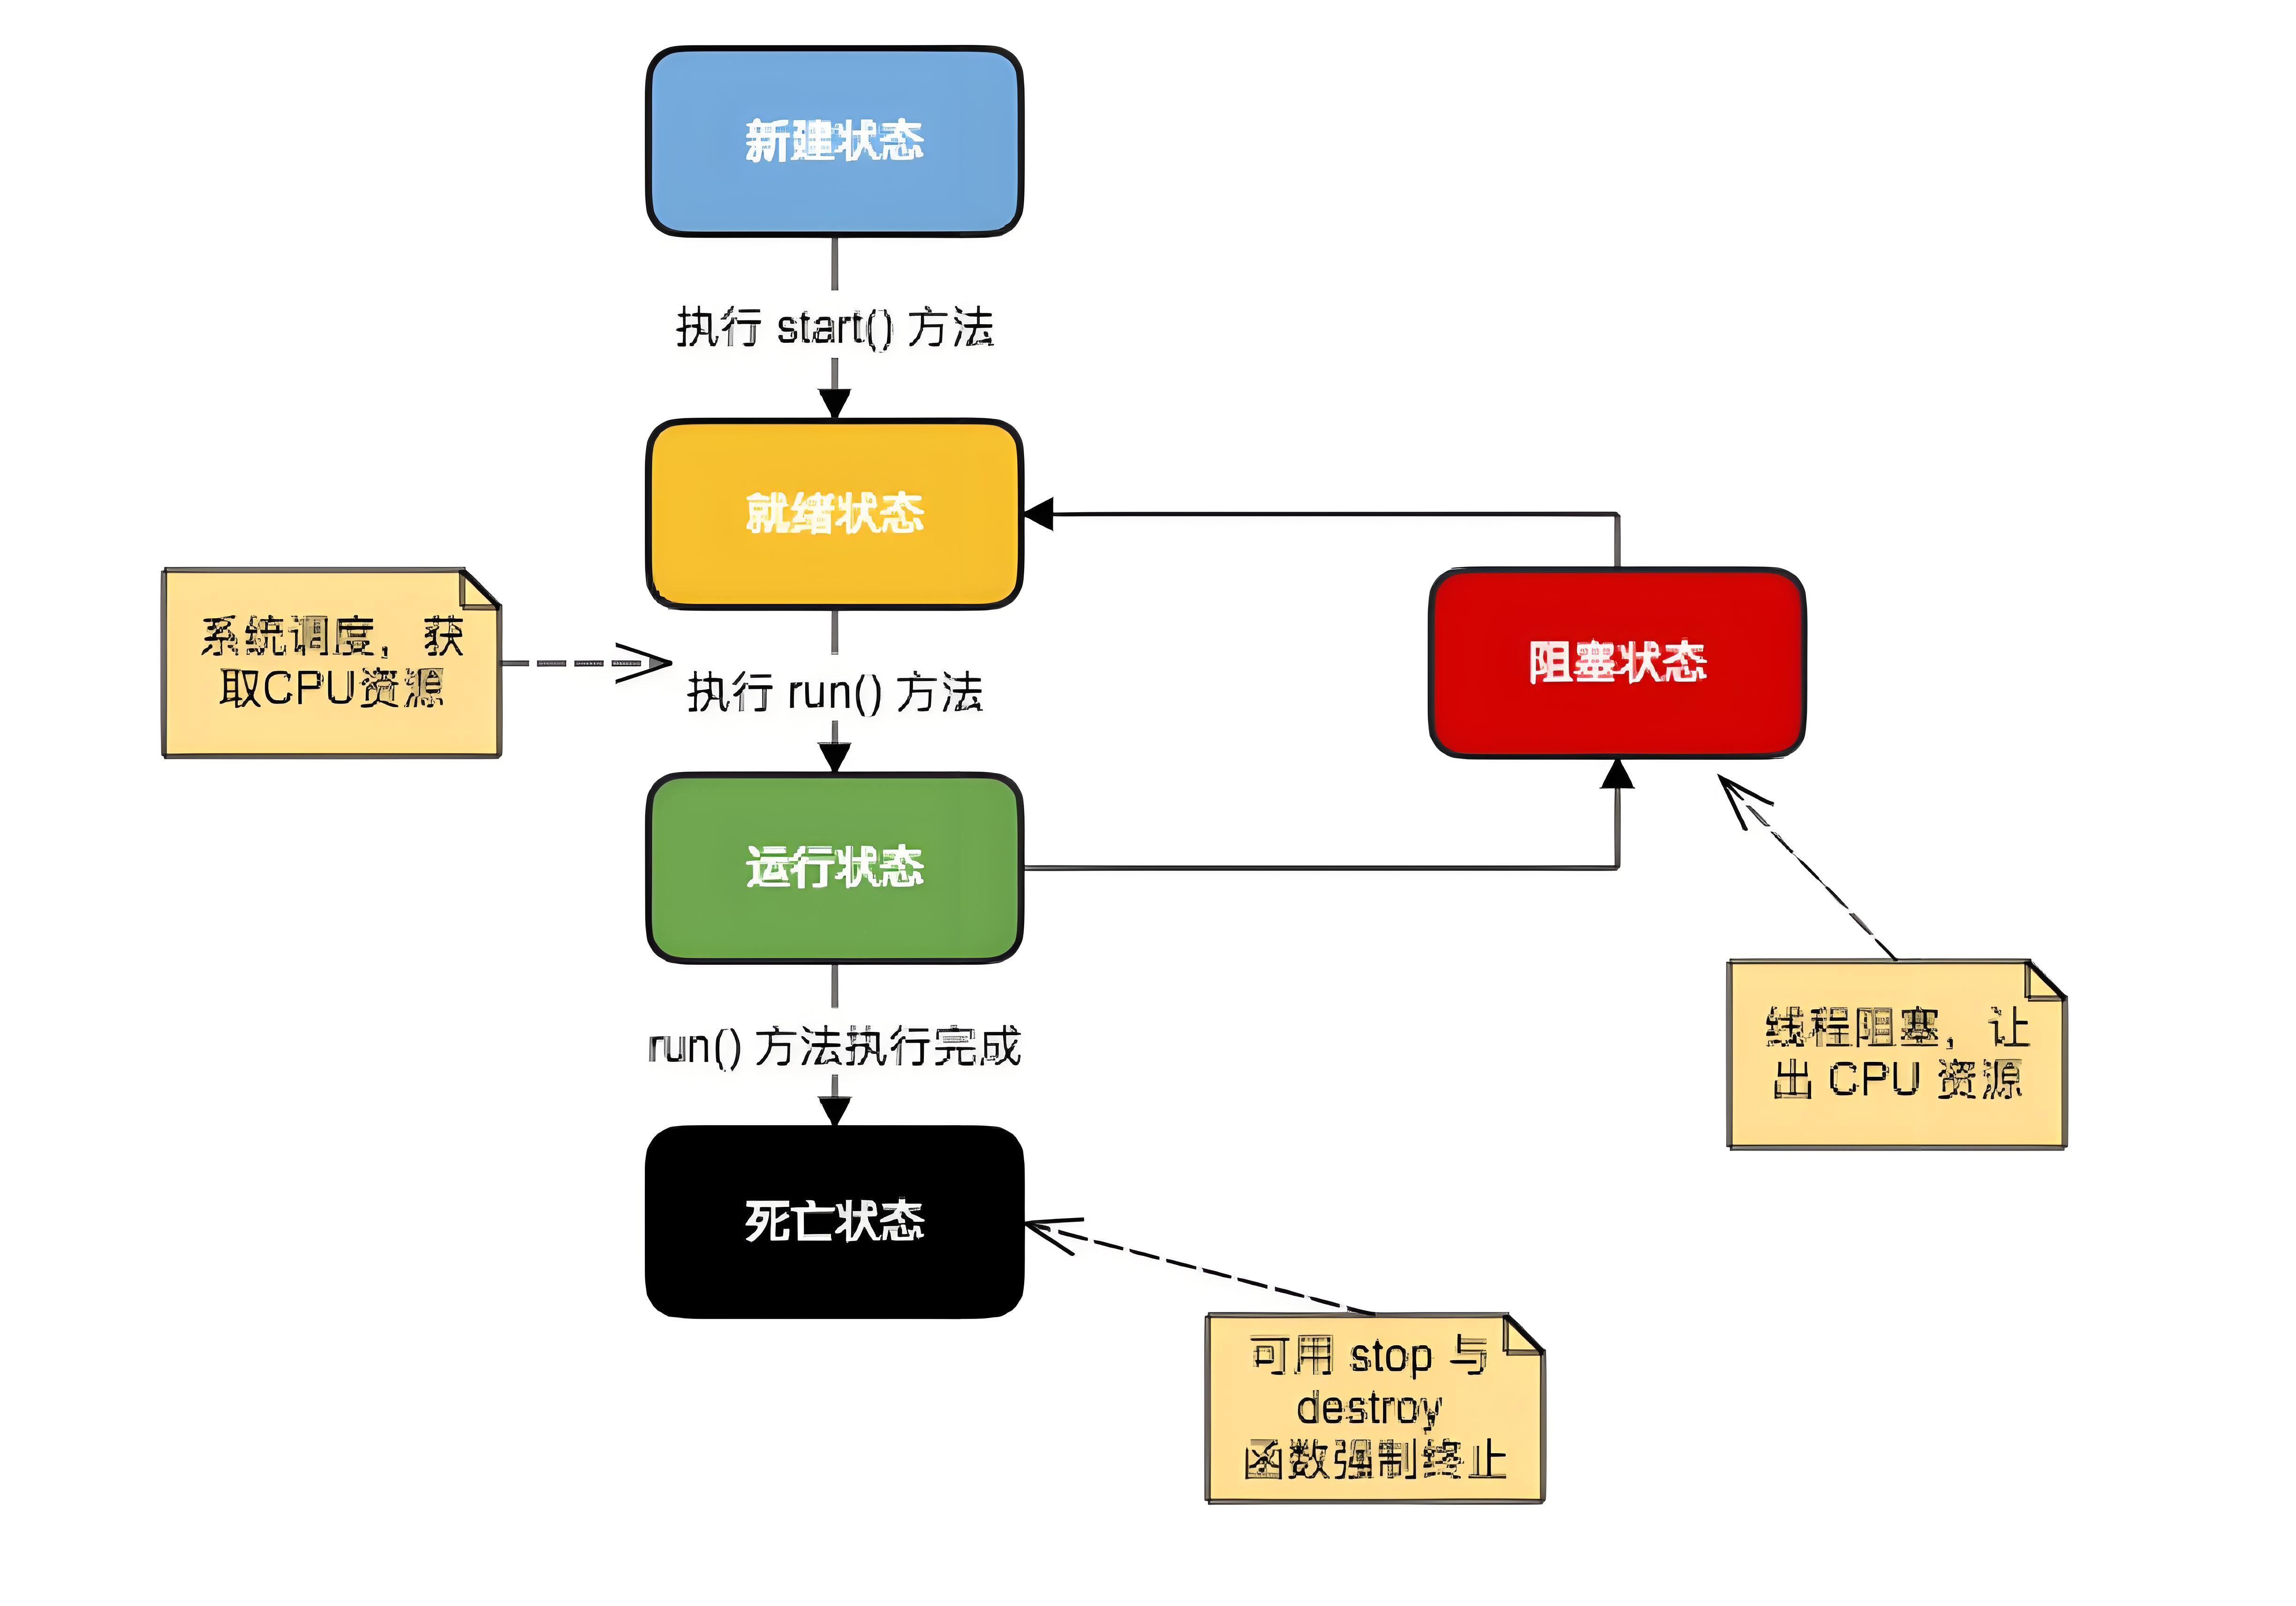
注意:很多多线程都是模拟出来的,真正的多线程是指有多个CPU,即多核,如服务器。如果是模拟出来的多线程,即在一个CPU的情况下,在同一个时间点,CPU只能执行一个代码,因为切换的很快,所以就有同时进行的错觉。
JDK5.0之后Java多线程的实现方式变成了四种,下面来简单的列举一下,如果需要更深入的了解,强烈建议阅读一下源码。
一、继承Thread类重写run()方法:
创建一个继承于Thread类的子类
重写Thread类的run() --> 将此线程执行的操作声明在run()中
创建Thread类的子类的对象
通过此对象调用start()
 // 1、 创建一个继承于Thread类的子类
class Test1 extends Thread {
     // 2、 重写Thread类的run()
     @Override
      public void run() {
           //Thread.currentThread().getName():获取当前线程的名字
          System.out.println("线程需要执行的代码" + "->" + Thread.currentThread().getName());
      }
}

public class ThreadTest1 {
    public static void main(String[] args) {
    	// 3、 创建Thread类的子类的对象
    	Test1 test1 = new Test1();
    	//多线程当然可以创建多个对象来开启多个线程
    	Test1 test2 = new Test1();
    	// 4、通过此对象调用start()方法启动线程
        //start()方法的作用:1)启动当前线程  2)调用当前线程的run()方法
        test1.start();
        test2.start();
    }
顺便插一句并不是test1先调用了start()方法就一定先比test2先执行,不清楚的小伙伴建议先了解一下多线程的概念,这里主要是对实现多线程的几种方式简单总结,概念不再赘述。
二、实现Runnable接口:
创建一个实现Runnable接口的类
实现Runnable中的run()方法
创建实现类的对象
将此对象作为参数传递到Thread类的构造器中,创建Thread类的对象
通过Thread类的对象调用start()
//1. 创建一个实现Runnable接口的类
class Test2 implements Runnable {
    // 2. 实现Runnable中的run()方法
    @Override
    public void run() {
        System.out.println("线程需要执行的代码" + "->"
                + Thread.currentThread().getName());
    }
}

public class ThreadTest2 {
    public static void main(String[] args) {
        // 3. 创建实现类的对象
        Test2 test = new Test2();
        // 4. 将此对象作为参数传递到Thread类的构造器中,创建Thread类的对象
        Thread t1 = new Thread(test);
        Thread t2 = new Thread(test);
        // 5. 通过Thread类的对象调用start()
        t1.start();
        t2.start();
    }
}
这种实现的方式没有类的单继承性的局限性更适合处理多个线程有共享数据的情况。
三、实现Callable接口
创建Callable的实现类
实现call方法,将此线程需要执行的操作声明在call()中
创建Callable接口实现类的对象
将此Callable接口实现类的对象作为传递到FutureTask构造器中,创建FutureTask的对象
将FutureTask的对象作为参数传递到Thread类的构造器中,创建Thread对象,并调用start()
获取Callable中call方法的返回值
 import java.util.concurrent.Callable;
 import java.util.concurrent.ExecutionException;
 import java.util.concurrent.FutureTask;
 //1.创建Callable的实现类
class Test3 implements Callable<Object>{
  //2.实现call方法,将此线程需要执行的操作声明在call()中
  @Override
  public Object call() throws Exception {
      int sum = 0;
    for (int i = 1; i <= 100; i++) {
        if(i % 2 == 0){
            System.out.println(i);
            sum += i;
        }
     }
     return sum;
     //如果不需要方法返回值
     //return null;
 }
public class ThreadTest3 {
  public static void main(String[] args) {
      //3.创建Callable接口实现类的对象
      Test3 numThread = new Test3();
      //4.将此Callable接口实现类的对象作为传递到FutureTask构造器中,创建FutureTask的对象
      FutureTask futureTask = new FutureTask(numThread);
      //5.将FutureTask的对象作为参数传递到Thread类的构造器中,创建Thread对象,并调用start()
      new Thread(futureTask).start();//用了匿名内部类
      /*
         可以和上面一样写成(相当于):
         Thread thread = new Thread(futureTask);
         thread.start();
      */
      try {
          //6.获取Callable中call方法的返回值
          //get()返回值即为FutureTask构造器参数Callable实现类重写的call()的返回值。
          Object sum = futureTask.get();
          System.out.println("总和为:" + sum);
      } catch (InterruptedException e) {
          e.printStackTrace();
      } catch (ExecutionException e) {
          e.printStackTrace();
      }
  }
}
这种创建线程的方式更加的麻烦,但是人家相比较实现Runnable接口的方式更强大相比实现Runnable接口的好处;
call()可以有返回值
call()可以抛出异常,被外面的操作捕获,获取异常的信息
Callable支持泛型
四、线程池
提供指定线程数量的线程池
执行指定的线程的操作。需要提供实现Runnable接口或Callable接口实现类的对象
关闭连接池
 import java.util.concurrent.ExecutorService;
 import java.util.concurrent.Executors;

 /**
  * 这里可以用实现Runnable的方式 也可以用实现Callable的方式
  *
  */
 class Test4 implements Runnable {
     @Override
     public void run() {
         System.out.println("代码");
     }
 }

 public class ThreadTest4 {
     public static void main(String[] args) {
         // 1. 提供指定线程数量的线程池  这里设置为10
         ExecutorService service = Executors.newFixedThreadPool(10);

         // 2.执行指定的线程的操作。需要提供实现Runnable接口或Callable接口实现类的对象
         service.execute(new Test4());// 适合适用于Runnable
         // service.submit(Callable callable);//适合使用于Callable

         // 3.关闭连接池
         service.shutdown();
     }

 }
这种方式的好处:
提高响应速度(减少了创建新线程的时间)
降低资源消耗(重复利用线程池中线程,不需要每次都创建)
便于线程管理
以上简单列举了创建线程的四种方式,有不少东西没有写;尤其是第四种,设置线程池属性等都没有演示。对于还在学习基础的小伙伴来说,前两种需要先重点掌握,后面两种可以先了解一下,等有一些多线程基础之后再进行后续学习。
五、 ThreadPoolExecutor
ThreadPoolExecutor+CountDownLatch的用法
1 ThreadPoolExecutor 创建参数
corePoolSize 核心线程数量, 可以设置allowCoreThreadTimeOut 关闭线程 maximumPoolSize 设置线程池中允许线程数量的最大值 KeepAliveTime 当前线程池中超过核心线程数并且处于空闲时,线程池统一让出系统资源 TimeUnit 用于KeepAliveTime的时间单位 workQueue 阻塞队列,用于存放以提交至线程池但未被执行的任务 ThreadFactory 自定义线程工厂创建线程,可以定义线程名、设置线程优先级、设置线程池是否为守护线程、设置线程所属线程组 RejectedExecutionHandler 拒绝策略 当任务超过阻塞队列的边界时,线程池拒绝新增的任务
2 CountDownLatch
CountDownLatch是一个同步助手,允许一个或者多个线程等待一系列的其他线程执行结束 主要方法 countDown()计数器减一 await()当前线程进入阻塞状态,直到count为0 await(long timeout, TimeUnit unit) 超时 getCount()返回当前计数。
3 Demo
import java.util.ArrayList;
import java.util.List;
import java.util.concurrent.*;

public class PoolDemo1 {
    static List<String> strList = new ArrayList<>(3);
    static CountDownLatch latch = new CountDownLatch(3);
    public static void main(String[] args) throws InterruptedException {
        ThreadPoolExecutor executor = new ThreadPoolExecutor(3,
                6,
                10000,
                TimeUnit.SECONDS,
                new ArrayBlockingQueue<>(10),
                Executors.defaultThreadFactory(),
                new ThreadPoolExecutor.DiscardPolicy());
    PoolDemo1 pool = new PoolDemo1();
    long time1 = System.currentTimeMillis();
    System.out.println(time1);
    executor.execute(pool::show);
    executor.execute(pool::show);
    executor.execute(pool::show);
    latch.await();
    long time2 = System.currentTimeMillis();
    System.out.println(time2);
    System.out.println(time2 - time1);
    System.out.println(strList.toString());
    }

    private void show(){
        try {
            TimeUnit.SECONDS.sleep(5);
            System.out.println(Thread.currentThread().getName() + "开始执行");
            strList.add(Thread.currentThread().getName());
            latch.countDown();
        } catch (InterruptedException e) {
            e.printStackTrace();
        }
    }
}